How to use Prisma? The app for iOS and Android that turns your photos into works of art
You have taken some beautiful photos, but you do not know how to make them really special? Then Prisma, available for iOS or Android, is the app for you! Thanks to some “artistic” filters will make your shots similar to real works of art!
Prisma is a fantastic – and free – application available for all iOS and Android devices. In a few moments will transform your photos into real works of art! Let’s see how to use Prisma for Android and iOS.
One of the most popular photo editing applications for Android and iOS smartphones is Prisma. Unlike the filters available on Instagram or Snapchat, this application allows you to apply very colorful effects to the photos and filters that recall the most famous paintings.
Now I show you what the basic features are, how to use Prisma at best and how to share images on Social in the blink of an eye.
How to use Prisma? The interface
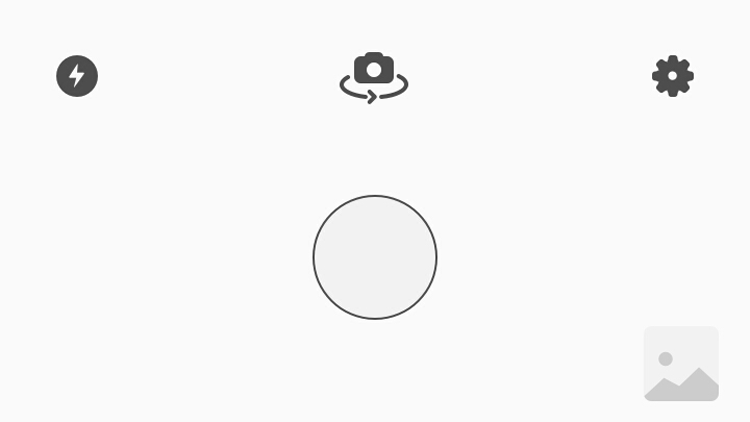
At first glance, the application is simple and intuitive, very clean. At startup it has two main areas. A control panel where you can upload or take a picture, and a control unit dedicated to three settings.
1) On the left there is a lightning icon that represents the flash. By default it is inactive, but by clicking on it you can select the automatic mode (a small green a will appear) that will activate when you take a picture in low light conditions or you can decide to leave it always active.
2) In the middle there is a camera icon, which allows you to alternate between the rear camera and the front, perfect to unleash the fury of your selfie.
3) On the right side there is the gear – shaped icon which gives access to the settings for …
- Overwrite the original images
- Save the changes automatically
- Activate or deactivate the Watermark
- Suggest additional retouching styles
The last two controls are the large circle that acts as a shutter and the thumbnail of the photos in the lower right corner that allows you to access all the images on your phone. Very useful because it allows you to apply Prisma filters to all images, not just those acquired through the app.
How to use Prisma? Turn photos into works of art
After choosing an image from the phone, or taking a picture from the app, you’ll see that the lower half of the screen will present a series of filters that show a preview of the effect that will be applied to images: just like on Instagram.
And this is where the true magic of Prisma comes into play.
These particular filters, in fact, range from Roy’s pop art to the splendor of the anime offered by Tokyo and Curly Hair. The filters are not permanent, so you can try them all without altering the original image, so be sure to experiment with different effects that show the final version of your little work of art.
Unlike the (much simpler) options on Instagram and Snapchat, Prisma filters require a little more work for rendering, so you’ll need to be patient and wait a few seconds to see the result of an effect in real time.
It is good to remember that once a filter is applied, it will be stored in the application. This means that you can compare the different styles without having to wait a second time to load the previous effect and then enjoy the preview in real time.


