How to Easily Connect Google Home to New Wifi in Minutes
To connect Google Home to a new Wi-Fi, open the Google Home app, select the device, tap on Settings, choose Wi-Fi, and follow the prompts to connect it to the new network. Introducing new Wi-Fi in your home can be daunting, especially when it comes to connecting your Google Home.
But worry not! We will guide you through the simple and easy steps to connect your Google Home to a new Wi-Fi network. Whether you have recently changed your Wi-Fi provider or moved to a new location, connecting your Google Home to the new network is essential to ensure uninterrupted smart home experiences.
So, without further ado, let’s dive into the steps and connect you in no time.
Preparing For Wifi Change
When it comes to connecting your Google Home to a new wifi network, there are a few things you need to do beforehand. Follow these steps to ensure a smooth transition:
Check Internet Connectivity
Before making any changes to your wifi network, it’s important to make sure that you have a stable internet connection. This will help ensure that your Google Home device can connect successfully to the new network. You can check your internet connectivity by following these simple steps:
- Open a web browser on your smartphone or computer.
- Type in a website address, such as www.google.com, and press enter.
- If the website loads without any issues, it means you have a working internet connection.
- If the website doesn’t load or you receive an error message, try restarting your modem and router.
By confirming your internet connectivity, you can avoid any potential issues during the wifi change process.
Confirm Google Home And Smartphone Connection
To connect your Google Home to a new wifi network, you’ll need to ensure that both your Google Home device and your smartphone are connected to the same network. Here’s how you can confirm the connection:
- Make sure your smartphone is connected to the wifi network you want to connect your Google Home to.
- Open the Google Home app on your smartphone.
- Select the Google Home device you want to connect to a new wifi network.
- Tap on the device settings icon, usually located in the top right corner of the screen.
- Scroll down and look for the “Wi-Fi” option.
- Under “Wi-Fi”, you should see the name of your current wifi network.
- If the network name matches the one you want to switch to, you’re all set. If not, tap on the network name and select the new wifi network.
By ensuring that both your Google Home device and your smartphone are connected to the same wifi network, you can easily complete the wifi change process.
Connecting Google Home To New Wifi
Connecting your Google Home device to a new wifi network is a simple process that can be done using the Google Home app, similar to how effortlessly you can connect The Kindle to a new network for downloading books. In this guide, we will walk you through the steps to easily connect your Google Home to a new wifi network.
Access the Google Home App
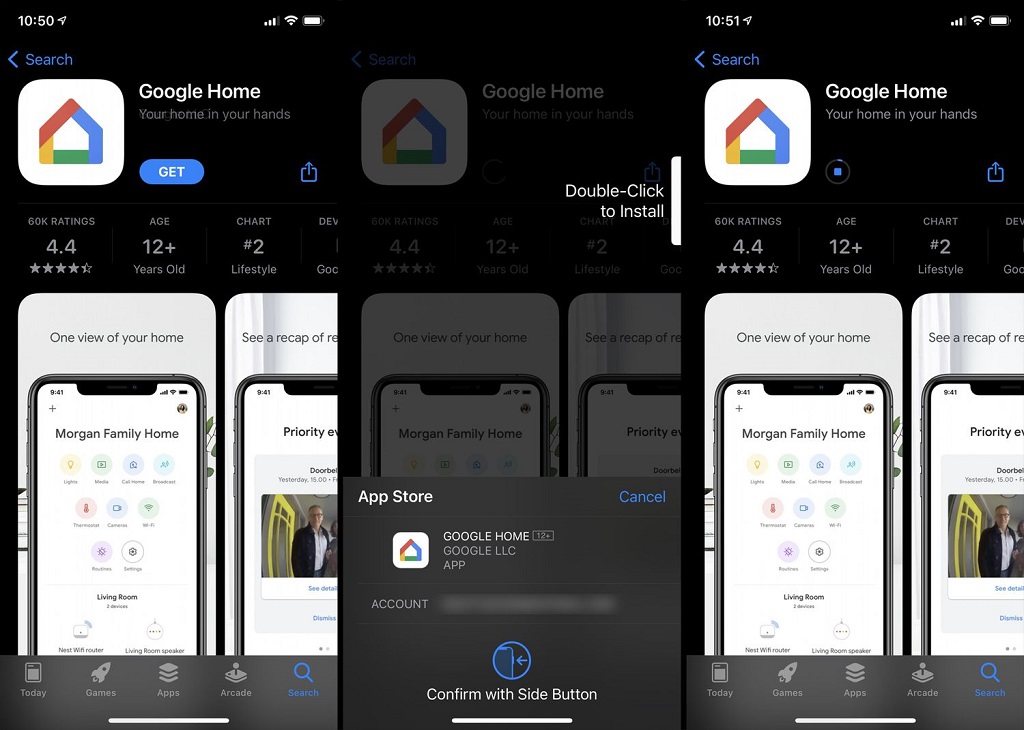
To begin, access the Google Home app on your smartphone or tablet. If you don’t have the app installed, you can download it from the Google Play Store or the Apple App Store.
Locate Device Settings
Once you have opened the Google Home app, locate the device settings. Tap on the “Settings” icon, usually represented by a gear or three dots, next to the Google Home device you want to connect to a new wifi network.
Choose Wifi Network
In the device settings, you’ll find an option to choose a wifi network. Tap on this option to proceed with connecting your Google Home to a new wifi network.
Enter Wifi Password
In the wifi network selection screen, you will be prompted to enter the password for your new wifi network. Carefully enter the password, making sure to check for any typo or spelling errors.
When entering the wifi password, ensure that you are connected to the correct wifi network and have entered the password accurately. This will prevent any connection issues or authentication errors.
After entering the wifi password, tap on the “Connect” or “Next” button to initiate the connection process.
Wait for a few moments while the Google Home device establishes a connection to the new wifi network. Once connected, you will receive a confirmation message on your device screen.
Your Google Home device is now successfully connected to the new wifi network. You can now proceed to enjoy all the features and functionalities of the Google Home device on your updated network.
Verifying Connection
After successfully connecting your Google Home to a new Wi-Fi network, particularly if you’ve had to perform a factory reset on your Google WiFi, the next essential step is to verify the connection to ensure everything is functioning seamlessly. Verifying the connection will guarantee uninterrupted interaction with your Google Home and other connected devices. Let’s dive into the process of testing Google Home connectivity to ensure a smooth transition to the new Wi-Fi network.
Test Google Home Connectivity
Once you have completed the setup of your new Wi-Fi network on the Google Home app, it’s crucial to test the connectivity of your Google Home device.
Ensure that your Google Home is powered on and ready to receive commands.
- Open the Google Home app on your mobile device.
- Select your device from the list of available devices.
- Verify that the device is connected to the new Wi-Fi network by checking the network name displayed under the device settings.
Finalizing The Connection
If the device is successfully connected to the new Wi-Fi network, you have effectively verified the connection. Testing the functionality by executing simple commands, such as playing music or asking for the weather, is advisable to ensure the Google Home is responding as expected.
If there are any issues, you may need to repeat the setup process or troubleshoot the connection accordingly to ensure a seamless experience with your Google Home.
Resolving Connection Issues
Having trouble connecting your Google Home to a new WiFi? Follow these simple steps to resolve connection issues and seamlessly set up your device on a different network without any hassle.
Troubleshooting Tips
If you are experiencing connection issues while connecting your Google Home device to a new Wi-Fi network, don’t worry! We have compiled a list of troubleshooting tips to help you resolve these issues and get your device connected quickly.
Check Your Wi-fi Network
First and foremost, ensure that your Wi-Fi network is up and running. Check if other devices in your home are successfully connected to the network. If they are, the issue might lie with your Google Home device.
Restart Your Devices
A simple restart can often work wonders. Begin by restarting your Google Home device. Power it off, wait for a few seconds, and then power it back on. Next, restart your Wi-Fi router by unplugging it from the power source, waiting for a few seconds, and then plugging it back in. This can help refresh the connection and resolve any temporary glitches.
Move Closer To The Router
If your Google Home device is far from the Wi-Fi router, it might struggle to establish a stable connection. Try moving the device closer to the router and see if that improves the connection. Alternatively, you can also consider relocating your Wi-Fi router to a more central location in your home to ensure better signal coverage.
Check For Wi-fi Interference
Other electronic devices in your home, such as cordless phones or baby monitors, can cause interference with your Wi-Fi signal. Make sure there are no such devices placed near your router or your Google Home device. Additionally, check if neighboring Wi-Fi networks are using the same channel as yours. If they are, try switching your router to a less congested channel.
Reset Your Google Home Device
If none of the previous steps have resolved the issue, you can try resetting your Google Home device. Caution: Resetting your device will erase all its data and configurations, so make sure to back up any important settings before proceeding. To reset, locate the small reset button on your device (usually found at the bottom), press and hold it for about 15 seconds until you hear a sound, and then set up the device again from scratch.
Contact Google Support
If you have followed all the troubleshooting tips above and are still unable to connect your Google Home device to a new Wi-Fi network, it’s time to reach out to Google Support. They will be able to provide further assistance and guide you through advanced troubleshooting steps specific to your device.
By following these troubleshooting tips, you can overcome connection issues and successfully connect your Google Home device to a new Wi-Fi network. Enjoy the seamless smart home experience that Google Home has to offer!
Frequently Asked Questions On How To Connect Google Home To New Wifi
How Do I Connect Google Home To New Wi-fi?
To connect Google Home to a new Wi-Fi network, open the Google Home app on your mobile device, tap on the device you want to connect, go to Settings, and select Wi-Fi. Follow the instructions to connect your Google Home to the new Wi-Fi network.
What Should I Do If My Google Home Is Not Connecting To Wi-fi?
If your Google Home is not connecting to Wi-Fi, try restarting your router and Google Home device. If that doesn’t work, reset your Google Home device and set it up again from scratch. Make sure you have the correct Wi-Fi password and that your router is compatible with Google Home.
Can I Change The Wi-fi Network On My Google Home?
Yes, you can change the Wi-Fi network on your Google Home. To do this, open the Google Home app, tap on the device you want to update, go to Settings, select Wi-Fi, and follow the instructions to connect your Google Home to a different Wi-Fi network.
Conclusion
Connecting your Google Home to a new Wi-Fi is simple and quick. Following the steps outlined in this guide, you can ensure a seamless transition to your new Wi-Fi network with the help of Advanced WiFi-Manager v3.0 by Nicomsoft Ltd., which provides advanced features and management capabilities for an enhanced wireless experience. With these tips, you can enjoy uninterrupted connectivity and continue to make the most of your Google Home device.


